
Three.js 는 자바스크립트 3d 라이브러리로 많은 곳에서 사용되고 있습니다.
다양한 라이브러리가 있지만, Three js를 사용하는건 아무래도 커뮤니티가 크고 TypeScript 지원이 잘 된다는 것이 그 이유입니다.
Three.js 엔 여러 장점이 있는데 우선 대부분의 브라우저에서 동작하고
3d 를 구현하기 위해 개별 플러그인이 필요하지 않습니다.
무엇보다 가장 큰 장점은 WebGL을 몰라도 쉽게 사용할 수 있다는 큰 장점이 있습니다.
WebGL은 일반 캔버스와는 달리 GPU 자원을 사용할 수 있어 성능상의 이점을 보입니다.
저는 간단한 웹팩 설정으로 ts를 이용하여 로컬에서 작업하였습니다. 설정 방식은 이 글을 참고하시면 좋을 것 같습니다.
설정하기
위 웹팩 설정을 완료했다면, 프로젝트의 구조는 다음과 같을 것입니다.
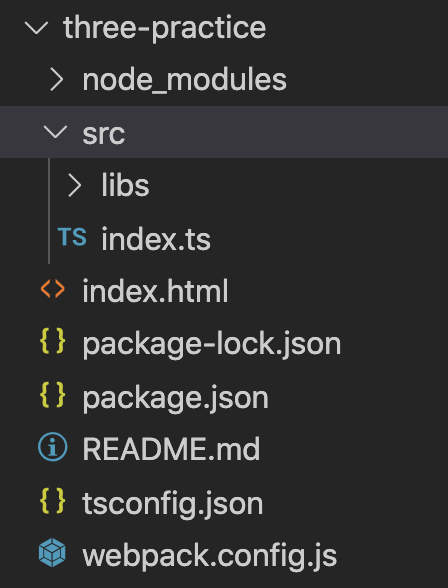
우선 index.ts에 작업을 할 것이고, html은 다음과 같이 설정합니다.
<html>
  <head></head>
  <style>
    body {
      margin: 0;
      overflow: hidden;
    }
  </style>
  <body>
    <script src="main.js"></script>
  </body>
</html>
body에 적용된 css는 webpack의 css-loader를 직접 추가하셔서 개별 css 파일로 분리하셔도 좋습니다.
앞으로 작성하는 모든 코드는 index.ts에 추가할 것입니다.
따라하기
우선 간단하게 따라해봅시다.
0. three.js 패키지를 설치합니다. three 라이브러리 내에 타입 정의가 있기 때문에, 타입 definition을 따로 설치하지 않아도 됩니다.
npm install three
1. main 함수를 추가하고, 해당 main함수를 window.onload에 할당합니다.
const main = () => {

}

window.onload = main;
2. html의 body에 output의 id를 가진 간단한 div를 추가합니다
const main = () => {
	const output = document.createElement('div');
    output.id = 'output'
    document.getElementsByTagName("body")[0].appendChild(div);
}
3. three.js 를 import하고, scene과 renderer를 선언합니다.
import * as three from "three"; // 최상위에 해줄 것

const main = () => {
	//...
    const scene = new three.Scene();
    const renderer = new three.WebGLRenderer();
}
여기서 주목할 부분은, 렌더링해주어야 할 대상(scene)과 렌더링해주는 대상(renderer)이 분리되어 있습니다.
4. renderer에 배경 색깔과 크기를 지정해주고, 그림자를 enable 해줍니다.
renderer.setClearColor(0xeeeeee);
renderer.setSize(window.innerWidth, window.innerHeight);
renderer.shadowMap.enabled = true;
그림자를 넣는 작업은 자원을 많이 소모하여 default로 false가 설정되어 있기 때문에 true로 변경해주어야 합니다.
5. plane, sphere과 cube를 추가해줍니다.
const planeGeometry = new three.PlaneGeometry(60, 20);
const planeMaterial = new three.MeshLambertMaterial({ color: 0xcccccc });
const plane = new three.Mesh(planeGeometry, planeMaterial);

const cubeGeometry = new three.BoxGeometry(4, 4, 4);
const cubeMaterial = new three.MeshLambertMaterial({ color: 0xff0000 });
const cube = new three.Mesh(cubeGeometry, cubeMaterial);

const cubeGeometry = new three.BoxGeometry(4, 4, 4);
const cubeMaterial = new three.MeshLambertMaterial({ color: 0xff0000 });
const cube = new three.Mesh(cubeGeometry, cubeMaterial);
위에서 Geometry와 Material을 따로 구성한 후 하나의 Mesh로 합치는 점에서, 이전에 학습했던 WebGL Fundamental의 Vector Shader와 Fragment Shader가 분리되어 있는 것이 떠오릅니다.
6. plane, sphere, cube의 그림자를 설정해줍니다. 그림자를 받기 + 그림자를 생성하기를 모두 추가해줍니다.
plane.castShadow = true;
plane.receiveShadow = true;
cube.castShadow = true;
cube.receiveShadow = true;
sphere.castShadow = true;
sphere.receiveShadow = true;
7. plane, sphere, cube의 위치를 지정해줍니다.
plane.position.set(15, 0, 0);
cube.position.set(-4, 3, 0);
sphere.position.set(20, 4, 2);
8. camera를 생성하고, 카메라의 위치를 지정하고, 카메라의 시점을 조정합니다.
const camera = new three.PerspectiveCamera(45, window.innerWidth / window.innerHeight, 0.2, 1000);
camera.position.set(-30, 40, 30);
camera.lookAt(scene.position);
9. 광원을 생성하고, 광원의 위치를 지정하고, 광원에 의해 그림자가 생성되게 설정합니다.
const spotLight = new three.SpotLight(0xffffff);
spotLight.position.set(-40, 60, -10);
spotLight.castShadow = true;
10. 생성한 개별 객체들을 scene에 추가해줍니다.
scene.add(plane);
scene.add(cube);
scene.add(sphere);
scene.add(spotLight);
camera는 render할 때 camera를 추가해줍니다. (렌더링되는 영역 - 시야와 세계는 분리되어 구성됩니다)
11. Renderer의 domelement를 output div의 하위 컴포넌트로 넣어줍니다. (꼭 이렇게 안해도 됨)
document.getElementById("output").appendChild(renderer.domElement);이렇게 하면, div id="output"의 하위 dom 객체로 renderer가 렌더링하는 canvas가 나타나게 됩니다.
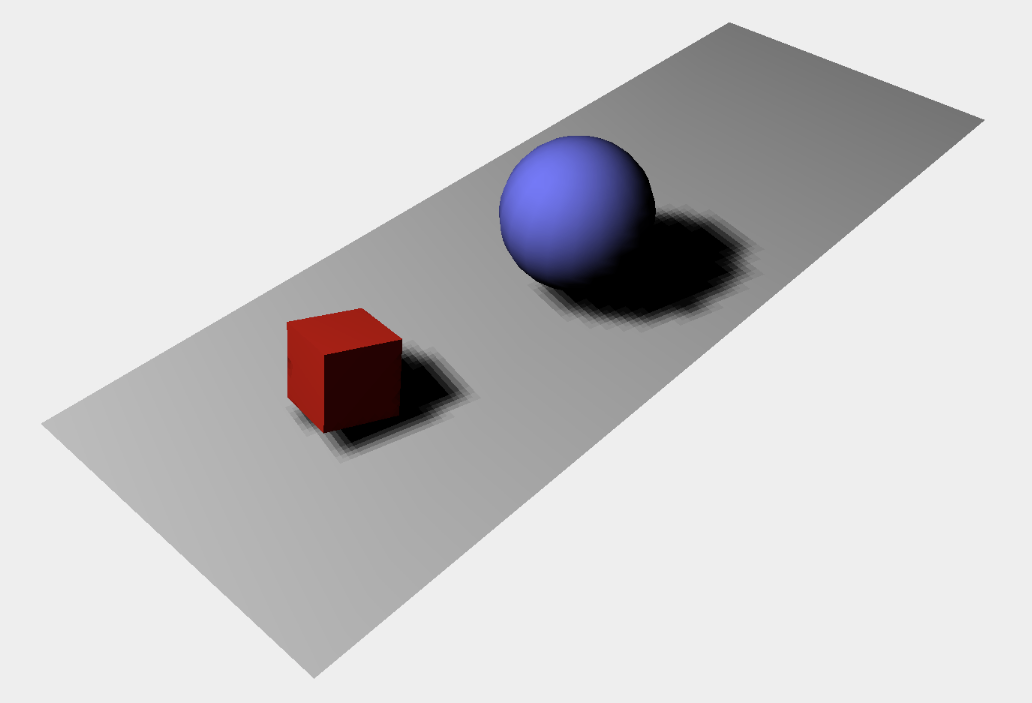
12. 마지막으로, renderer로 렌더링해줍니다.
renderer.render(scene, camera);
이렇게 하면 다음과 같은 화면을 볼 수 있을 것입니다.
지금까지 무엇을 했는지 정리해보면
1. Scene을 정의하였습니다.
2. Renderer를 정의하였고, 그림자를 설정해주었습니다.
3. 각 Object의 Geometry, Material을 정의하고 position을 지정하였으며 그림자를 설정해주었습니다.
4. 광원을 정의하고 위치를 지정한 후 그림자를 설정해주었습니다.
5. 카메라를 정의하고, 카메라의 위치 및 보는 방향을 지정하였습니다.
6. 렌더러를 돔에 추가하고, 렌더링하였습니다.
다음 글에는 각 컴포넌트의 정확한 동작 방식에 대해 이해하도록 해보겠습니다.
'Web > Graphics' 카테고리의 다른 글
| [4] Three.js - Material (0) | 2020.09.28 |
|---|---|
| [3] Three.js - Scene, Light Sources (0) | 2020.09.23 |
| [1] WebGL Fundamental (0) | 2020.09.10 |


댓글